The Course
18 Ways to Play

Hole 1
The opening hole sets the tone beautifully. With a dam stretching along the left and trees lining the right, accuracy is more important than distance. A bunker strategically placed near the green punishes any wayward approach, making this a hole where smart play trumps raw power.
Hole 2
A demanding par 5 that doglegs left after a tight tee shot framed by trees. Position off the tee is crucial to open up the fairway. Longer hitters can take on the corner, but most players will lay up short of the green and face a precise third shot into a well protected putting surface.

Hole 3
This par 4 requires precision both off the tee and into the green. Trees wait on the right, while a bunker guards the left landing zone. The green is full of subtle undulations, turning even short putts into a test of nerve and touch.
Hole 4
A short par 4 with plenty of risk reward. Fairway bunkers left and right squeeze the landing area, so many players choose a long iron or fairway wood for control. That leaves a short approach to a generous green, but poor positioning off the tee can leave you scrambling for par.


Hole 5
This hole is all about shaping your drive. Tall trees on the right demand a controlled line down the left hand side. The reward is a clear second shot into a large, receptive green. Play it safe and it’s a straightforward par, but stray right and you’ll be hacking out from the trees.
Hole 6
The only par 3 on the front nine, but not one to take lightly. A bunker left and a sharp mound right mean accuracy is everything. Miss the green and scrambling becomes a real challenge, especially if the pin is tucked away.


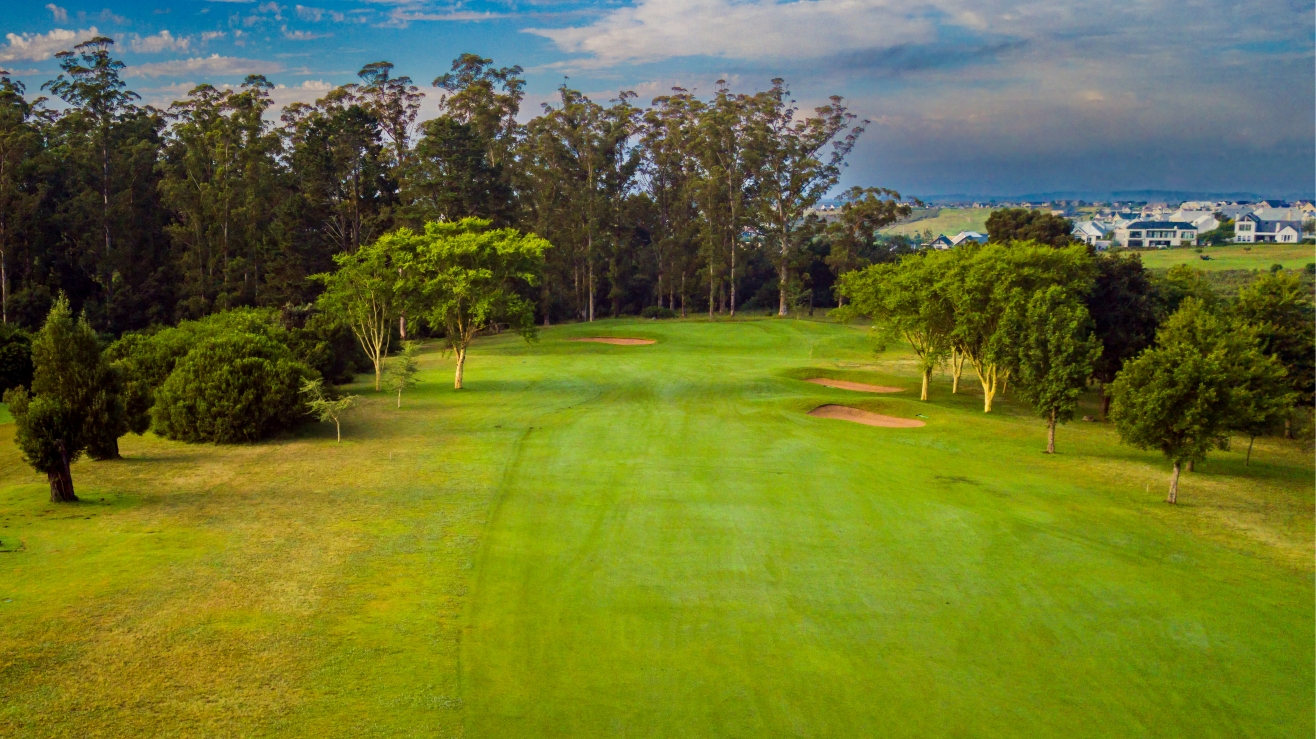
Hole 7
Rated stroke 1, this dogleg par 4 is one of the toughest tests on the course. The elevated tee offers breathtaking views of the Outeniqua Mountains, but don’t be distracted, the drive must find position to give any chance of reaching the green in regulation. It’s a hole that can make or break your front nine.
Hole 8
A dogleg right par 4 that demands careful strategy. Drives that hug the right side open up the approach, while anything left risks being blocked by trees. The green is guarded by both bunkers and slopes, making accuracy key on the second shot.


Hole 9
A challenging par 4 to close the outward nine. Hazards left and trees right make the drive intimidating, but find the fairway and the approach is far more manageable. Anything offline leaves you grinding for bogey at best.
Hole 10
The back nine begins with a straight but tight par 4 framed by tall trees. Position is everything, as out of bounds lurks left of the green. It’s a hole that rewards a calm, measured tee shot and a confident second.
Hole 11
This par 5 stretches alongside an out of bounds fence running the entire length of the left side, a constant threat from tee to green. A well struck drive sets up a comfortable lay up and approach, but nerves and missed hits often turn it into a real test.
Hole 12
The fairway slopes naturally to the right, so aim left off the tee to avoid trouble. Approaches must account for a subtly sloping green that’s hard to read. This is a hole where local knowledge really shows.


Hole 13
Though the shortest par 3 on the course, don’t be fooled, the green is narrow and surrounded by tricky run offs. Miss your target and you’ll be fighting to save par. Accuracy and distance control are vital.
Hole 14
A par 5 with a wide landing zone but danger lurking left. Drives down the right side give the best angle to attack. Long hitters can chase an eagle opportunity, while others will play it as a steady three shotter.

Hole 15
One of the most picturesque holes on the course. The elevated tee provides a commanding view, while the large green invites aggressive play. Distance control is the key here, it’s a genuine birdie chance for those who manage it well.
Hole 16
The final par 5 offers options: take on the fairway bunker with a big drive, or play safe and lay up short. Another bunker guards the green, making the approach decision crucial. It’s a hole that rewards bold play but punishes mistakes.


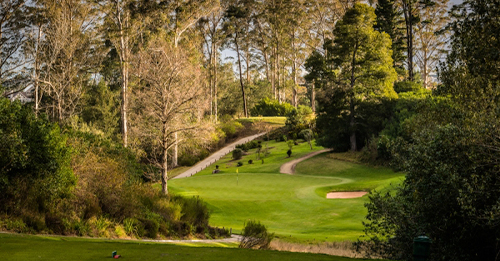
Hole 17
The signature par 3 and one of the most memorable holes in South Africa. Played from an elevated tee across a valley with water in play, it demands precision and nerve. Ranked among the world’s top 500 holes, it’s a challenge that lives long in memory.
Hole 18
The toughest closer imaginable. The fairway leans toward a dam on the left, while thick bush and the dreaded “snake pit” lurk right. Finding the fairway is only half the battle, the approach must also be precise. A hole that demands your full focus to finish strong.